I'm sure many of you out there have heard the term "Green screen" if not in a photography sense, then definitely in the world of videography. (You may have even heard it called a Blue screen or Chroma key - I'll touch on these terms in a moment)
Weather forecasters have long stood in front of one of these screens while the images of maps, temperatures, and precipitation are magically transmitted to our TV's.
Out of all truthfulness, there's not really much 'magic' to it. Way back in the 1940's films began using these techniques to create special effects and wipes (a way to transition from one scene to another) According to
Wikipedia,
"Chroma key [also called color keying, colour-separation overlay (CSO; primarily by the BBC), greenscreen, and bluescreen] is a technique for mixing two images or frames together, in which a color (or a small color range) from one image is removed (or made transparent), revealing another image behind it."What's this mean to you & me? It basically means that if we use a big green or blue backdrop in our pictures, we can replace that background with just about anything. Why green or blue? Since most of us have a reddish skin tone, green and blue are just about the furthest colors from us. And we can end up with some very great pictures - as long we do it correctly.
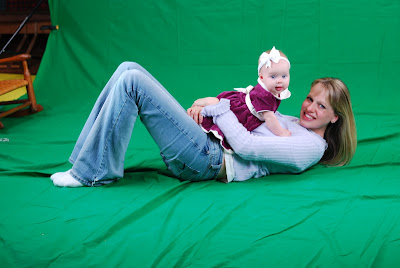
Pictured below, you can see what a green screen looks like - it's a HUGE piece of brightly colored green canvas, that's typically held up with poles & clamps. It's not easy to set up yourself - especially when you're first starting out. And the sheer size of the canvas makes it a bit cumbersome.
But there are several keys to successful green screen photo shoot...
~ Be aware of what your subject plans on wearing. If the "green screen" thing is something they want, make sure they are fully aware that what they wear is very important. By letting your clients know ahead of time, they can avoid colors in their outerwear that are similar to the color of the background.
~ Make sure the lighting across the green screen is perfectly even along your entire shooting area. The more even you can get your lighting on the background, the easier & faster it will be to cut out, then paste in a new background.
~ Have your subject stay as far away from the backdrop as possible, while still being in/on the green screen. This also ties in to the shadows... Try to avoid them completely if at all possible. Though this isn't a huge crisis, it definitely makes cutting out the green screen background much easier.
~ Use lighting behind on your subject if possible. I believe this is called rim light... It tends to yield better contrast between your subject and the green background. It also prevents a green 'glow' from the backdrop onto your subject.
Below are a couple of examples of green screen photos that have been completely manipulated...
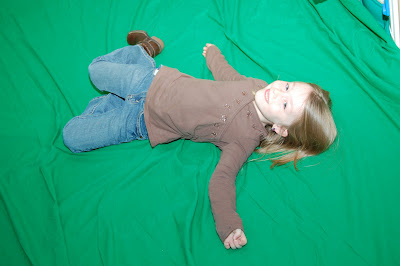
Original shot (SOOC - Straight out of the Camera)
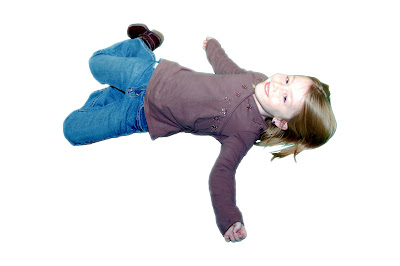
Green screen background selected & cut out.
This layer has been duplicated & placed on white background to what the photo looks like with no background.
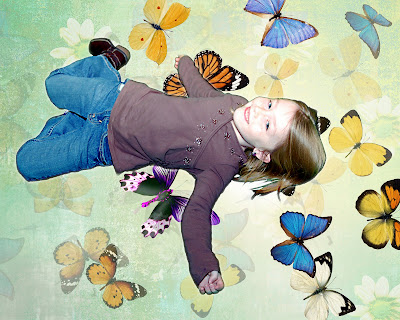
Green screen background replaced with butterfly background
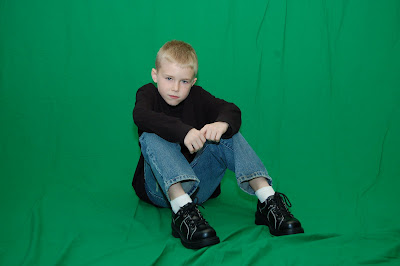
Original picture (SOOC)
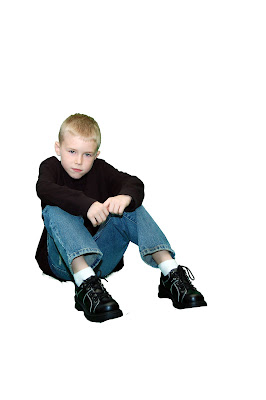
Green screen background selected & cut out.
This layer has been duplicated & placed on white background to what the photo looks like with no background. The picture has also been placed into a portrait orientation to fit the background chosen...
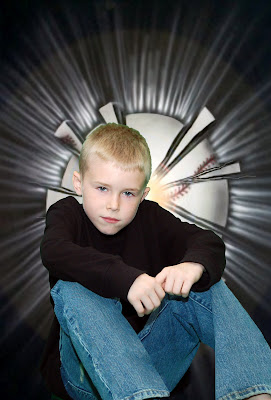
Background replaced with baseball background
In this picture, the little boy's pants have also been lengthened by using the cloning tool in combo with the bandaid tool.
As you can probably see, there are a few disadvantages I faced with these photos... They were a bit washed out, and there were still hints of green around the kids (especially the little girl since she was actually laying on the green screen), which is why a dark or greenish background was used to replace the green screen.
The reason the kids were so washed out is because I was still shooting my camera entirely on automatic mode when these pictures were taken. Shooting on auto is NOT a bad thing... The only problem here is that the camera 'saw' all that green (which is actually quite dark without using extra lights) and overcompensated for it.
My apologies for not providing many examples of photos manipulated with green screen technology. To be perfectly honest, I tried it - many times - and found that it just wasn't right for me. I have figured out how to replace almost any background, and I've even found that it's sometimes just easier to do it without the green screen. But don't let me steer you one way or the other; try out green/blue screen shooting if you think it's right for you. That's the beauty of photography: everyone has personal likes & dislikes, strengths & weaknesses.
Tomorrow, I'll revisit the replacing of backgrounds without a green screen. And I'll provide many examples of photos with their
non-green screen backgrounds replaced.
**NOTE - This was not actually my green screen. A friend of mine was kind enough to let me borrow it, and for that I am very grateful. It seems that I don't really need one. Or at least I don't want one...!

 Obviously the color is brighter, but if you look closely, the sky is an entirely different color. I selected only the skyline with the magnetic lasso tool and used the hue/saturation tool (with colorize selected) to brighten up the entire scene.
 And that personal touch came with the cropping. In any other picture, I woudn't have dared to take such a very small portion of the original. But it was for a slide-show and quality wasn't of vast importance.
 A grandfather went on and on about how his "little angel" seemed to only be an angel in his eyes... Never cooperating for pictures, not even allowing her hair to be professionally done.
 As she looks so sweet & innocent - almost angelic - after editing.


